
Go to Pixlr Express, and open your desired image.
Εγγραφή / Είσοδος

Get 40% off Back To School Deal Now!
null
Effortlessly enhance your images with our AI-powered sticker generator. Learn how to add stickers to photos online in just a few clicks, and discover a world of creative possibilities. Add stickers to photos now and elevate your visual content!

Unlock the power of personalized stickers with our AI Sticker Generator. This innovative online tool uses artificial intelligence to transform your text prompts into custom stickers. Unlike pre-made sticker libraries, our AI technology lets you create unique stickers from scratch, making it easy to add stickers to photos that reflect your personality and style.
Go to Pixlr Express, and open your desired image.
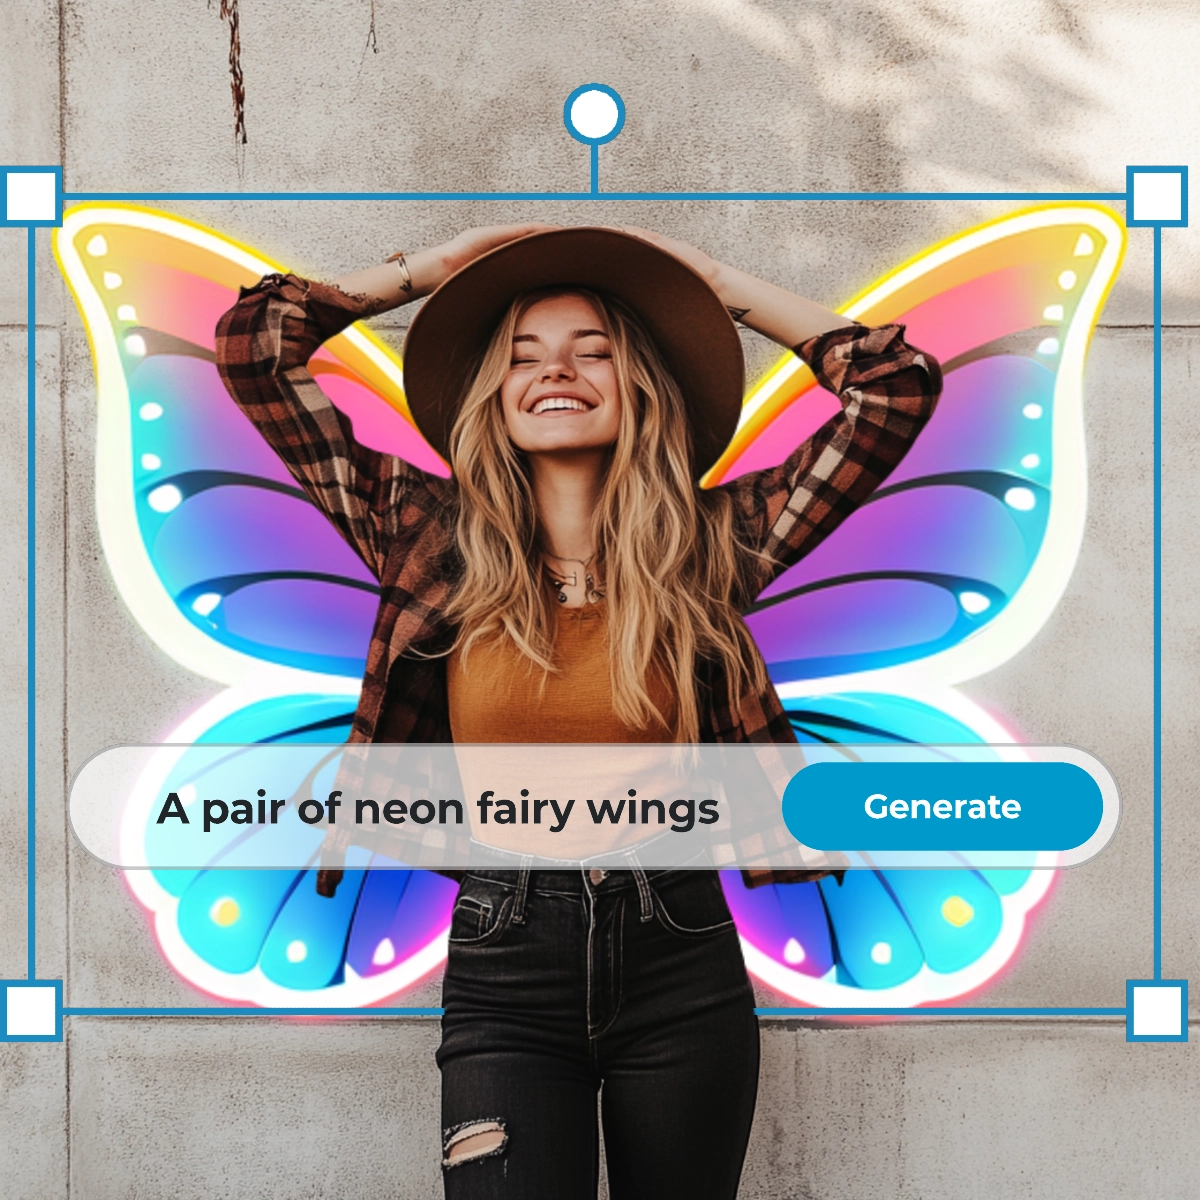
Click on AI tools, and select Sticker Maker.
Write a descriptive prompt of the sticker. This could be a specific object, character, or design.
If there are certain elements you don’t want in your sticker, input a negative prompt too.
Click ‘Generate’ to create your sticker, noting that each generation costs AI credit.
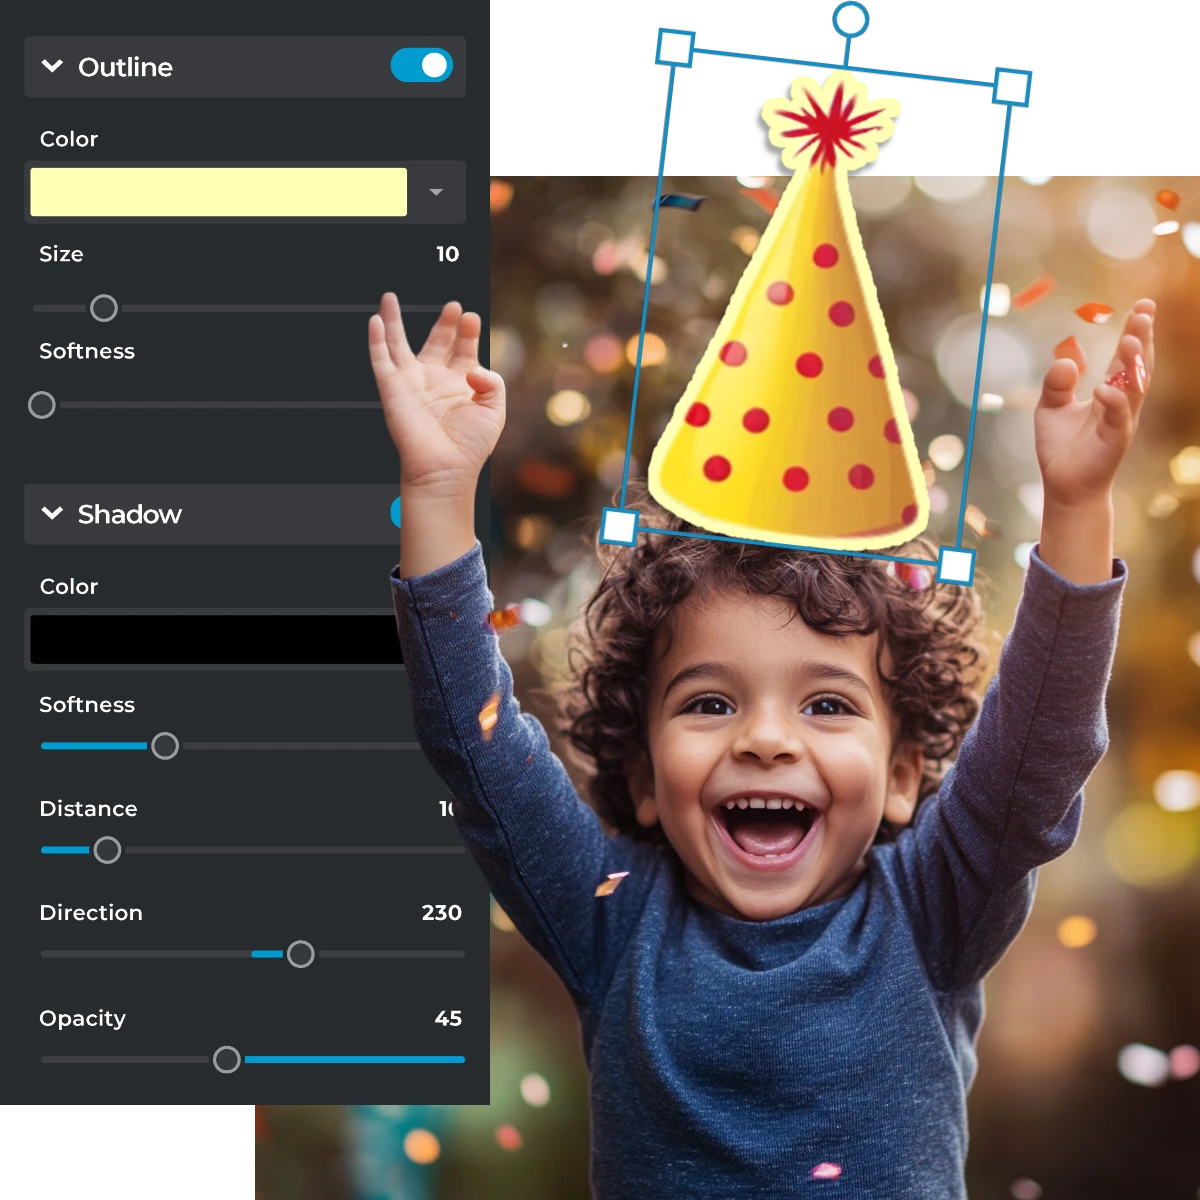
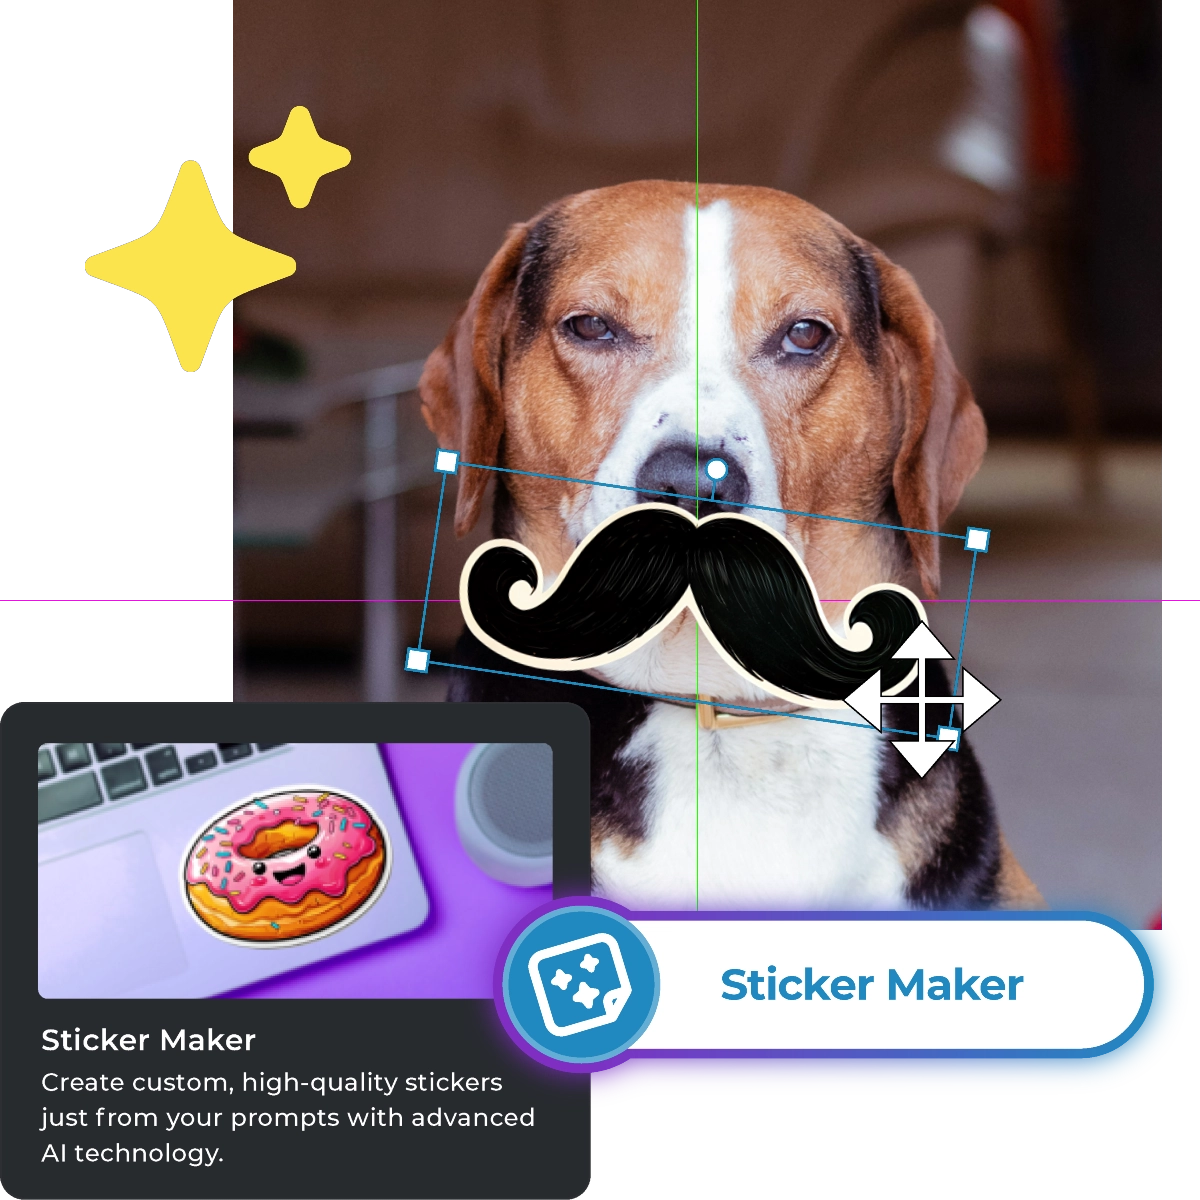
Use the drag-and-drop functionality to position the sticker on your photo, adjust its placement and scaling.
Once satisfied, download your edited photo in JPG or PNG format.

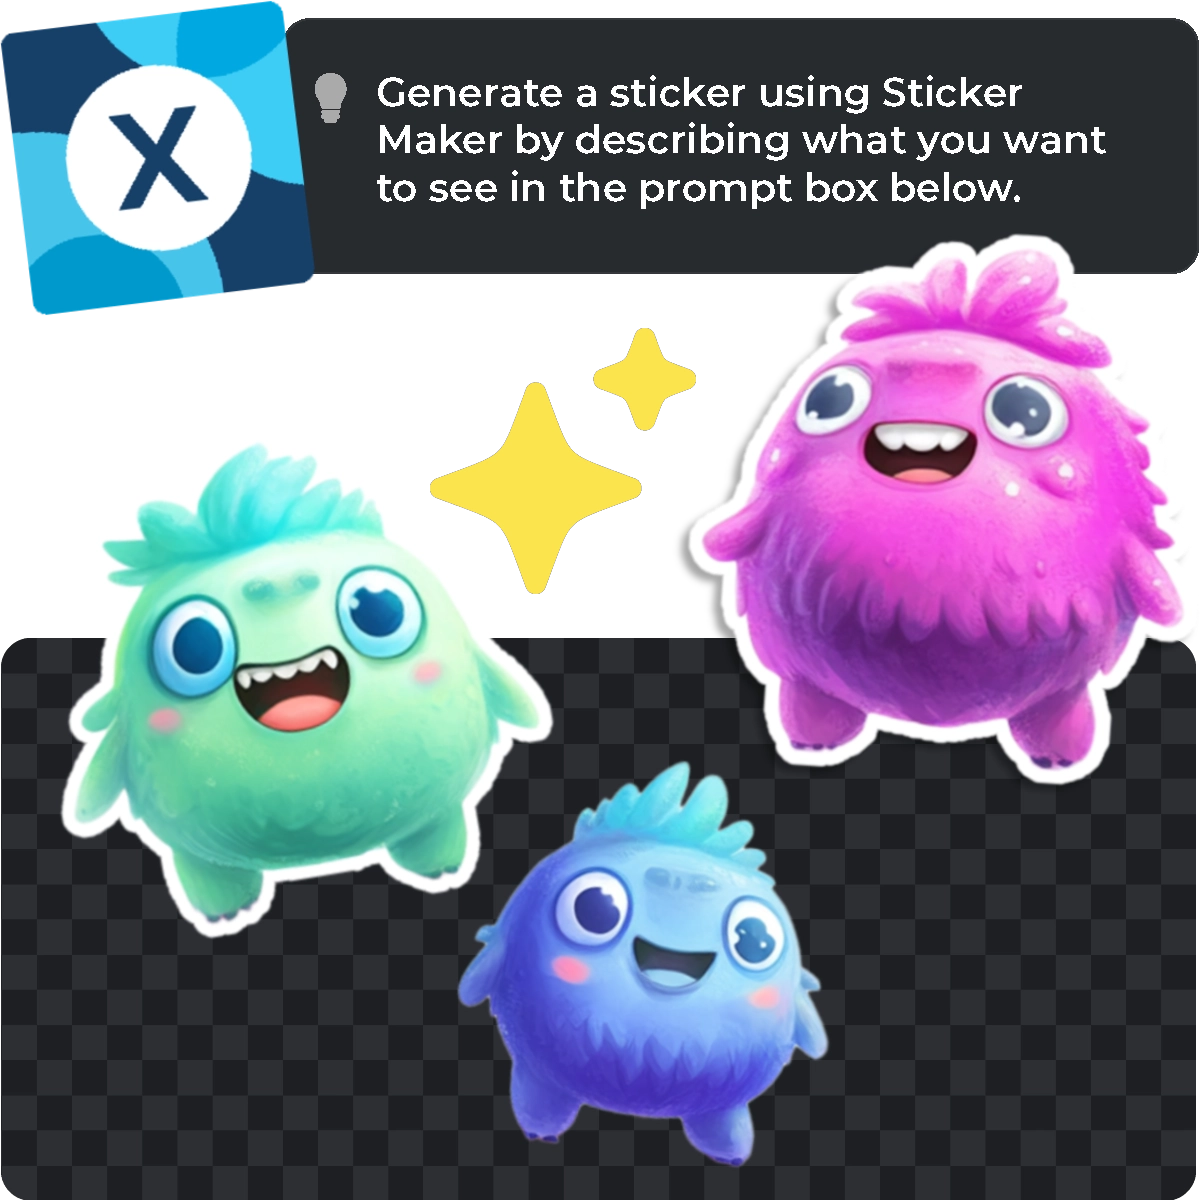
Discover the simplest way to add stickers to photos with Pixlr's user-friendly interface. Our AI-powered sticker generator guides you through the creation process, making it easy to learn how to add stickers to photos in just a few steps. No design experience needed - simply open your photo in Pixlr Express and start creating custom stickers like a pro.
Unleash your creativity and add stickers to photos that truly reflect your vision. Our AI sticker generator uses text-to-sticker technology to bring your ideas to life, allowing you to create custom stickers from scratch. Learn how to add stickers to photos with limitless possibilities - simply describe your design, and our AI will transform it into a unique sticker that's all your own.

Elevate your images with high-quality stickers that perfectly complement your photos. Our AI sticker generator produces top-resolution stickers that seamlessly integrate into your visuals, making it easy to add stickers to photos like a pro. Learn how to add stickers to photos with flawless results - every sticker generated with Pixlr is optimized for a professional finish that enhances your image.
Take complete control of your sticker design with Pixlr's intuitive customization tools. Easily adjust size, color, and orientation to add stickers to photos that perfectly match your vision. With our AI sticker generator, you can even use negative prompts to fine-tune your design, learning how to add stickers to photos with precision and flexibility. Unlock endless creative possibilities and bring your unique ideas to life.
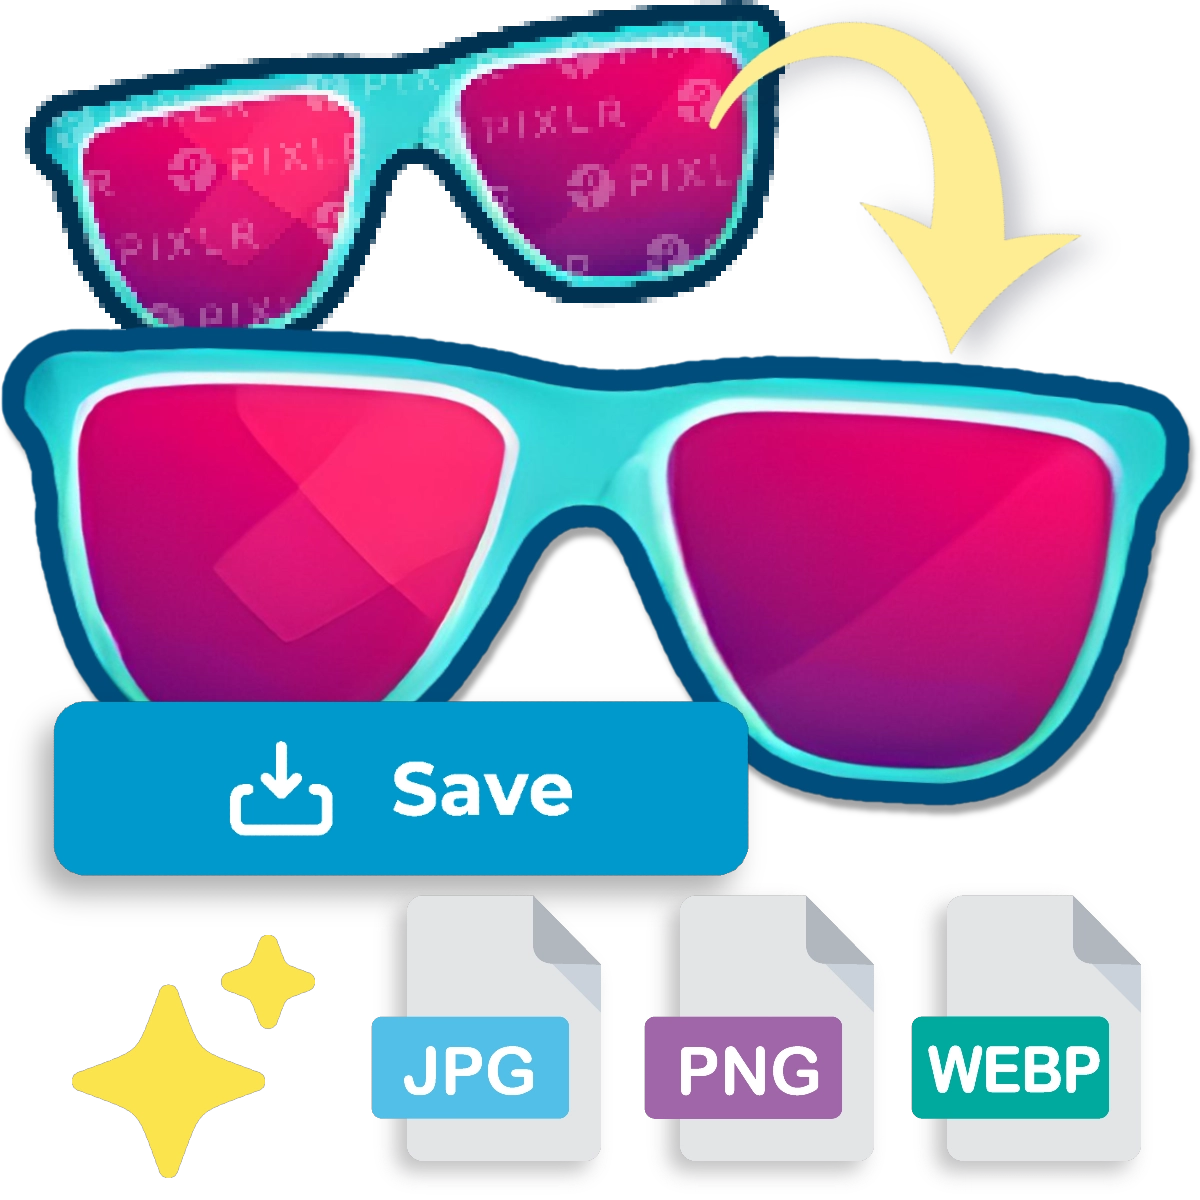
Add stickers to photos without compromising on quality or authenticity. Our AI sticker generator produces watermark-free stickers, ensuring your images remain clean, professional, and truly original. Learn how to add stickers to photos with Pixlr and enjoy seamless integration, perfect for sharing or displaying your photos at their absolute best.
Add stickers to photos with precision and ease using Pixlr's intuitive drag-and-drop tool. Learn how to add stickers to photos with perfect placement, thanks to our AI sticker generator's seamless scaling and positioning capabilities. Easily maneuver stickers across your image to achieve the desired layout, and focus on unleashing your creativity with smooth, intuitive control.
Yes, you can easily resize stickers to fit your photo perfectly using the customizable options.
You can create stickers from text prompts using Pixlr’s AI sticker generator, save them in your device, and open them again in Pixlr Express to add texts using the text editor.
Once you’re satisfied with your edits, click the "Save" button to download your photo to your computer.
Absolutely, you can customize stickers by changing their size, color, and orientation.
Yes, you can add as many stickers as you like by generating and placing each one individually.
Businesses can use Pixlr to design compelling stickers that enhance marketing materials like flyers, brochures, and email campaigns for greater impact.